


Fire Tag

Conchi made this awesome tag using my Fire Kit. She will have a tutorial up for it soon. Be sure to check it out http://graficospsp.blogspot.com/2010/05/tag-fire.html
Thanks Conchi i love it!! ♥Kelly
NEW KIT! No Princess!
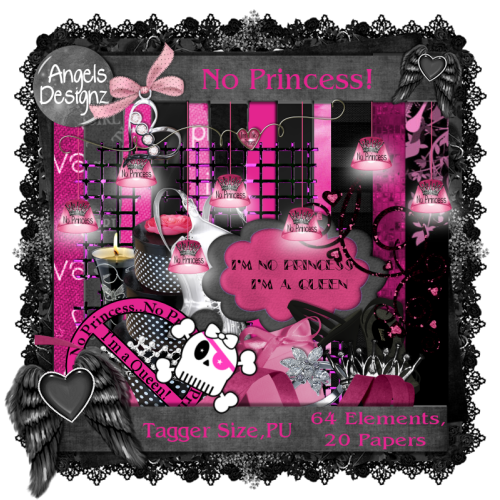
Yep it's been awhile lol. Here's a new kit by me called No Princess. This is a tagger size kit and Personal use only! There's 64 elements and 20 papers in this kit. All done in my fav colors lol. Be sure to check out all of my stores tommorow b/c this fabby kit will be available then. Hope u like.
♥Kelly
Diva

All of my tutorials require a working knowledge of PSP! This tutorial was written by me on May 24,2010. It is of my own ideas and creation! Any other tutorials found to be similar is coincidental.
Supplies Needed
Scrapkit of Choice
I'm using a Wonderful kit called Diva Style,made by Gothic Inspirations. This is a PTU kit i cannot supply. You can grab this awesome kit here
Tube of Choice
I'm using the Wonderful work of Keith Garvey. You must have a license to use his work! You can purchase that here
Let's Begin
Open new image 600x600,Flood fill white.
Copy and paste GlitterMat,Resize to your liking.
Image,Rotate,Free Rotate,20.00 to the left.
Make sure all layers is unchecked.
Add dropshadow of choice.
Copy and paste Bracket,Resize to your liking.
Place like mine,Add dropshadow.
Copy and paste lights,Resize again to your liking.
Place like mine and add a drosphadow.
Copy and paste tube of choice,Resize 90%,Place in center of tag like mine.
Add dropshadow of choice.
Copy and paste Balloons,Resize to your liking.
Place on the left side of tag on the bracket.
Copy and paste Wordart2,Resize to your liking.
Place on the top of the string to the balloons like mine.
Add dropshadow of choice.
Copy and paste Bow3,Resize 25-30%,Place on top of Wordart2,Add dropshadow.
Copy and paste Martini,Resize to your liking.
Place on the right side of your tube,Add light dropshadow.
Copy and paste Kiss,Resize 20-30%,Place on martini.
Add a light dropshadow.
Copy and paste Raspberries,Resize to your liking.
Place at the bottom of the martini.
Copy and paste Crown.
Image,Rotate,Free Rotate, 20.00 Right.
Place on the top right side of the glittermat.
Copy and paste Mesh,Resize to your liking,Place behind the glittermat.
Add a light dropshadow.
Copy and paste paper20,Apply mask of choice.
Merge Group on mask layer.
Now Add Your Name and Copyright Info!!
All done.
Diva Style

I made this tag using Jessica's aka Gothic Inspirations~Diva Style Sampler Kit. This is a FTU kit and can be found on her blog HERE
UnderGround Scraps Collab~Eclipse
 Here's my part of the UnderGround Scraps Collab. A bunch of designers have come together to create a Eclipse collab. It's not available yet but will be soon. Be sure to check it out!! Perfect for all those Twilight Saga Fans out there. This is exclusively @ UnderGround Scraps
♥Kelly
Broken Home

All of my tutorials require a working knowledge of PSP! This tutorial was written by me on May 9,2010. It is of my own ideas and creation! Any other tutorials found to be similar is coincidental.
Supplies Needed
Scrapkit of Choice
I'm using a Wonderful kit called Mommie Dearest,made by Gothic Inspirations. This is a PTU kit i cannot supply. You can grab this awesome kit here
Tube of Choice
I'm using the Wonderful work of Ida Larsen. You must have a license to use her work! You can purchase that here
Let's Begin
Open new image 600x600,Flood fill white.
Open frame2 in psp,Image,Rotate,Rotate Counter Clockwise.
Now Copy and paste frame2 onto canvas,Resize to your liking.
Click on the frame with your Magic wand tool.
Selections,Modify,Expand by 3.
Selections,Invert.
Copy and paste paper11,Hit delete on your keyboard.
Selections,Select none.
Copy and paste tube of choice,Do the same as above.
Merge the frame,paper,tube together.
Take your Deform Tool,Rotate the merged layer to the left.
Add a dropshadow of choice.
Copy and paste LetterPaper,Resize to your liking.
Take your Deform Tool again and rotate to the left.
Add a dropshadow to it,Move behind the frame layer.
Copy and paste SmokingClip,Resize 25-30%.
Take your Deform Tool again and rotate to the right.
Place like mine,Add dropshadow.
Copy and paste Tape,Resize to your liking.
Place on the corner of frame and LetterPaper,Add dropshadow.
Copy and paste Tag2,Resize 20-25%,Place on top left corner of frame.
Copy and paste HandPrint,Resize 20-25%,Place like mine.
Add a dropshadow 2x's.
Copy and paste ChalkBoard,Resize 25-30%.
Take your Deform Tool,Rotate to the left.
Add dropshadow of choice,Place like mine.
Copy and paste Coffee,Resize 20-25%,Place like mine and add a dropshadow.
Copy and paste Vice1,Resize to your liking.
Place in between the ChalkBoard and the Coffee cup,Add dropshadow.
Copy and paste Candle,Resize 25%.
Place on the right side of the coffee,Add dropshadow.
Copy and paste paper4,Apply mask of choice.
Merge group on mask layer.
Now Add Your Name and CopyRight Info!!
All done.
Dark Secrets

All of my tutorials require a working knowledge of PSP! This tutorial was written by me on May 9,2010. It is of my own ideas and creation! Any other tutorials found to be similar is coincidental.
Supplies Needed
Scrapkit of Choice
I'm using a Wonderful kit called Gothiquesque,made bu Creationz by Jo. This is a PTU kit i cannot supply. You can grab this awesome kit here
Tube of Choice
I'm using the Wonderful work of Keith Garvey. You must have a license to use his work! You can purchase that here
Template Used
Template7 made by Wicked Princess,Thanks hun! You can find the Template HERE
Let's Begin
Open Template 7 in psp.
Highlight the lg circles layer,Take your magic wand tool and click inside the circle.
Selections,Invert.
Copy and paste paper of choice,Hit delete on your keyboard.
Selections,Select none.
Now your going to do this for the other parts of the template.
See mine for reference on each and pick a paper for each one that you like or use the same as me.
Once your done with the template layers.
Copy and paste your tube of choice,Resize 80%.
Add dropshadow of choice.
Copy and paste LaceUp,Resize to your liking.
Place like mine,Add dropshadow.
Duplicate,Image,Mirror,Move into place.
Copy and paste Skull Gems1,Resize to your liking.
Place like mine and add a dropshadow.
Copy and paste Skull Gems2,Resize to your liking.
Place like mine,Add a light dropshadow.
Copy and paste CandleStick,Resize to your liking.
Place at the bottom right side of template,Add dropshadow.
Copy and paste Feather,Resize 30% or to your liking.
Place in front of the candlestick.
Copy and paste Python2,Resize to your liking.
Place in front of the feather,Add dropshadow.
Copy and paste DragonFly,Resize 30%.
Place on the top left side of the template,Add dropshadow.
Now copy and paste Paper of choice.
Apply a mask of choice,Merge group on mask layer.
Now Add your name and copyright info!
All done.
Master Slave

All of my tutorials require a working knowledge of PSP! This tutorial was written by me on May 9,2010. It is of my own ideas and creation! Any other tutorials found to be similar is coincidental.
Supplies Needed
Scrapkit of Choice
I'm using a Wonderful kit called Chained To The Pain,made by Gothic Inspirations. This is a PTU kit i cannot supply. You can grab this awesome kit here
Tube of Choice
I'm using the Wonderful work of Ismael Rac. You must have a license to use his work! You can purchase that here
Let's Begin
Open new image 600x600,Flood fill white.
Copy and paste Filmstrip,Resize 60%.
Take your Deform Tool and rotate it like mine.
Copy and paste Tube of choice,Resize 80%.
Add a light dropshadow to your tube.
Copy and paste Boa,Resize to your liking.
Place on the tube.
Duplicate,Move the original one below the tube.
Take your Eraser Tool,Erase parts of the boa like mine.
Copy and paste Fob,Resize to your liking.
Place like mine,Add a light dropshadow.
Copy and paste Flower2,Resize 25%.
Place on the top of the fob like mine.
Add a light dropshadow.
Copy and paste Flower1,Resize 20%.
Place on top of flower2,Add light dropshadow.
Copy and paste Bag,Resize to your liking.
Place like mine,Add dropshadow.
Copy and paste Leaves,Resize to your liking.
Rotate the leaves so they are straight across.
Place at the bottom of your tube.
Duplicate,Image,Mirror,Move into placement.
Copy and paste Blindfold,Resize to your liking.
Place by the bag,Add dropshadow.
Copy and paste Whip2,Resize to your liking.
Place like mine and add a dropshadow.
Copy and paste IceCube,Resize to your liking.
Place on the right side of your tube,Add dropshadow.
Duplicate,Move next to the other,See mine for reference.
Copy and paste wine,Resize to your liking.
Place by the icecubes,Add dropshadow.
Copy and paste Kiss,Resize around 40%.
Duplicate Kiss,Image,Mirror,Move into place.
Copy and paste Paper3,Apply mask of choice.
Merge Group on mask layer.
Copy and paste Paper9,Apply same mask as before.
Merge group on mask layer.
Now add Your Name and CopyRight Info.
All done.


Angelic Pleasures
 All of my tutorials require a working knowledge of PSP! This tutorial was written by me on May 3,2010. It is of my own ideas and creation! Any other tutorials found to be similar is coincidental.
Supplies Needed
Scrapkit of Choice
I'm using a Wonderful kit called Vindictive Pleasures,made by Gothic Inspirations. This is a PTU kit i cannot supply. You can grab this awesome kit here
Tube of Choice
I'm using the Wonderful work of Keith Garvey. You must have a license to use his work! You can purchase that here
Let's Begin
Open new image 600x600,Flood fill white.
Copy and paste Brick,Resize to your liking.
Copy and paste Rath,Resize to your liking.
Duplicate,Image,Mirror,Move into place.
Copy and paste Mesh,Add a light dropshadow.
Move this layer below the path but above the brick.
Copy and paste Plants,Resize to your liking,Place on the left side of the brick.
Add dropshadow,Duplicate,Image,Mirror.
Copy and paste Flower2,Resize 10%.
Now duplicate a few times,and place in various spots on the plant.
Copy and paste Windows,Resize to your liking,Place just like mine.
Now on the Brick layer.
Take your Eraser tool and remove the part of the brick that is hanging out of the window on both sides.
Copy and paste Light,Place behind the windows.
Duplicate this layer so the light is brighter.
Copy and paste wings,Resize to your liking.
Add a light dropshadow.
Copy and paste tube of choice,Resize 80%.
Place in front of the wings like mine,Add dropshadow.
Copy and paste Lamp,Resize to your liking.
Add dropshadow and place like mine.
Copy and paste Bow2,Resize 20% or to your liking.
Copy and paste Charm,Resize 20% or to your liking again.
Place Charm on Bow2,Merge these 2 together and place like mine.
Copy and paste Paper16,Place below all layers but above white background.
Apply mask of choice,Merge Group on mask layer.
Move this layer to the left of the canvas,Duplicate,Image,Mirror.
Now Add Your Name and CopyRight Info!!
All done.
Subscribe to:
Posts (Atom)


