CHAT TO ME
MY TERMS
All of my ideas are copyrighted to me as they are my original designs. Any resemblence to any other tutorial is purely coincidental.
Do Not Translate, copy, email, download (ie; save to your own hard drive) distribute and/or make scripts/ quick guides from my tutorials.
Do Not hot link to my images or files.
Do Not upload my files to any other site. Do not share my files with others, as some of the contents require permission from thier creators to be shared.
If you are a group manager & wish to use my tutorials in your challenges, you must email me for permission BEFORE you link to my site. I reserve the right to join any group that links to my site.
VISITORS
Labels
- Awards (12)
- CT TUTORIALS (312)
- CUSTOM SERVICES (148)
- Freebies (64)
- MY TUTORIALS (299)
- PTU CU (12)
- ScrapKits (152)
- TAGS (9)
Blog Archive
- 2012 (60)
- 2011 (308)
- 2010 (375)
-
2009
(333)
- December(17)
- November(15)
- October(18)
- September(5)
- August(10)
- July(25)
- June(15)
- May(18)
-
April(30)
- Girlie Girl
- Ocean Dreams
- Newest Blinkie 4/23/09
- More New Blinkies 4/21/09
- Newest Blinkies 4/21/09
- Sweet On Me
- Spring Flowers
- Easter Fun
- Newest Blinkie 4/18/09
- Newest Kit~SunFlowers~4/16/09
- Newest Kit 4/14/09
- 4 The Girls
- Pixie Magic
- Only Me
- Newest Blinkie 4/12/09
- Newst Blinkie 4/9/09
- Newest Blinkies 4/8/09
- I Wanna Be A RockStar
- Shine On Me
- Easter 2009
- Newest Blinkie 4/4/09
- Newest Animated Banners 4/4/09
- Some More New Blinkies 4/3/09
- Newest Blinkies 4/3/09
- Sexy Lil Pixie
- Sweet-Tart
- Dream Of Me
- Seduce Me
- Newest Blinkie 4/1/09
- Newest Animated Banners 4/1/09
- March(54)
- February(51)
- January(75)
- 2008 (13)
Girlie Girl
 All of my tutorials require a working knowledge of PSP!This tutorial was written by me on April 25,2009. It is of my own ideas and creation! Any other tutorials found to be similar is coincidental.
Supplies Needed
Scrapkit of Choice
I'm using a Wonderful kit called Girly Visions,made by QueenBrat Designs. This is a PTU kit i cannot supply. You can purchase her kit here
Tube of
using the Wonderful work of Keith Garvey. You must have a license to use his work! You can purchase that here
Mask of Choice
Let's Begin
Let's Begin
Open new image 600x600,Flood fill white
Copy and paste frame01,Resize 60%
Copy and paste tube of choice,Resize 80%
Place to your liking,Duplicate,Move original below frame layer
Find your Eraser tool,Remove the parts hanging over the bottom of the frame on your duplicated tube
Add dropshadow to original tube
Copy and paste ruffle01,Resize 25%,(See mine for placement),Add dropshadow
Copy and paste bow01,Resize 25%,Place on the end of the ruffle,Add dropshadow
Duplicate,Image,Mirror
Copy and paste paper09,Resize 70%,Move below frame layer
Highlight your frame layer,Take your magic wand tool,Click on the inside of your frame
Selections,Modify,Expand by 5,Selections,Invert
Highlight your paper09 layer,hit delete on your keyboard,Selections,Select none
Add a dropshadow of choice to your frame layer
Copy and paste paper08,Resize 75%
Apply mask of choice,Merge group on mask layer
Find your deform tool,Stretch the mask out a little bit
Copy and paste Flower03,Resize 40%,Add dropshadow(See mine for placement),Duplicate,Image,Mirror
Copy and paste Pendant01,Resize 40%,Add dropshadow
Click on the side of the frame,(See mine for reference) Duplicate,Image,Mirror
Copy and paste Bow02,Resize 20%,Add dropshadow
Place on the ring of Pendant01,Duplicate,Image,Mirror
Add Your Name and CopyRight Info!
That's it,Hope ya liked my tut:)
Labels:
MY TUTORIALS
|
0
comments
Ocean Dreams
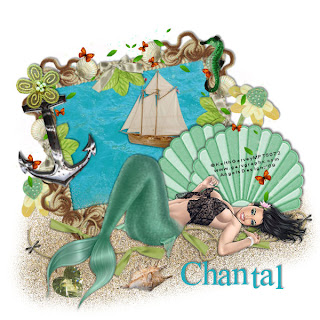 All of my tutorials require a working knowledge of PSP!This tutorial was written by me on April 23,2009. It is of my own ideas and creation! Any other tutorials found to be similar is coincidental.
Supplies Needed
Scrapkit of Choice
I'm using a Wonderful kit called OceanView,made by Chantal @ ChaDesignz. This is a PTU kit i cannot supply. You can purchase her kit here
Tube of Choice
I'm using the Wonderful work of Keith Garvey. You must have a license to use his work! You can purchase that here
Let's Begin
Open new image 600x600,Flood fill white
Find frame2,Image,Rotate,Rotate Clockwise
Copy and paste as new layer,Resize 40%
Find your deform tool,Rotate to the left a little bit
Copy and paste paper2,Move below frame layer
Find your magic wand tool and click inside the frame
Selections,Modify,Expand by 5,Selections,Invert
Highlight your paper layer,Hit delete on your keyboard,Selections,Select none
Copy and paste tube of choice,Resize if needed
Add dropshadow to both frame and tube
Copy and paste shell2,Resize 60%,(See mine for placement)
Add dropshadow,Duplicate,Pull this one to the right a bit
Take your deform tool again,And rotate the left shell to the left and the on right rotate to the right a bit
Copy and paste swirl,Resize 30%,Place along the top left side of the frame,Duplicate,Image,Mirror
Copy and paste misc(anchor),Resize 60%,Place on left side of frame,add dropshadow
Use your deform tool to rotate it a bit
Copy and paste seahorse,Resize 30%,Add dropshadow and place on right side of frame
Copy and paste flower5,Resize 30%,(See mine for placement)
Add dropshadow,Duplicate,Image,Mirror,Use your deform tool again
Rotate to the left and place on left side of frame @ the bottom
Copy and paste flower8,Resize 20%,Add dropshadow,Place on top of anchor
Find paper5,Look in your patterns under your material palette,once you find paper5
Find your airbrush tool,Add new raster layer below all layer but above white background layer
Airbrush some sand under and around your tube,(See mine for reference)
Add another dropshadow to your tube using these settings
Vertical:2,Horizontal:-2,Opacity:40,Blur:3.00,Color:Black,Shadow on new layer unchecked,Hit ok
Copy and paste ribbon2,Resize 60%,Place under your tube layer,(See mine for reference),Add same dropshadow as before
Copy and paste boat,Resize 20%,Place like mine and add same dropshadow as before
Copy and paste heart,Resize 15%,Place to your liking in the sand
Change your opacity to 80
Copy and paste shell5,Resize 15%,Place on the sand,change the Opacity to 80,Add dropshadow
Add your name and copyright info!
All done,Hope you enjoyed my tut:)
Labels:
MY TUTORIALS
|
0
comments
Newest Blinkies 4/21/09
These 2 Blinkies was made for Alicia @ Un-Leash-ed Scraps. Using her newest kit Uplifting not released yet! Check out her blog HERE
Woohooo a Twilight Blinkie! Kit used is called Bella's Lullaby made by Nicole @ Simply Irresitible Designs.
Labels:
CUSTOM SERVICES
|
0
comments
Sweet On Me
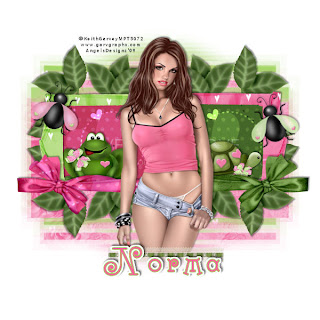 All of my tutorials require a working knowledge of PSP!This tutorial was written by me on April 20,2009. It is of my own ideas and creation! Any other tutorials found to be similar is coincidental.
Supplies Needed
Scrapkit of Choice
I'm using a Wonderful kit called Sweets4Sweet,made by Norma @ Swheat Creations. This is a PTU kit i cannot supply. You can purchase her kit here
Tube of Choice
I'm using the Wonderful work of Keith Garvey. You must have a license to use his work! You can purchase that here
Mask of Choice-WSL_mask145,You can get it here
Let's Begin
Open new image 600x600,Flood fill white
Copy and paste paperframe 1,2Resize 40%,(see mine for placment),On paper frame2,Image,Mirror
Copy and paste tube of choice,Place in the center of the 2 frames,Add dropshadow
Copy and paste CBkg3,Resize 40% place below frame on the left
Find your magic wand tool,Click inside the frame layer,(You will see marching ants)Selections,Modify,Expand by 5,Selections,Invert
Hightlight paper layer,Hit delete on your keyboard
Selections,Select none,Add dropshadow of choice to frame on left
Do the same as above with the frame on the right only this time use CBkg6
Copy and paste fly1,Resize 35%
Find your deform tool,Rotate the fly to the right a little
Add dropshadow,Place on the top corner of the left frame
Do the same for fly2,only rotate to the left and place on the right frame at the bottom
Copy and paste TieWrap1,Resize 35%,Place on bottom left frame,Add dropshadow
Copy and paste TieWrap4,Resize 35%,Image,Mirror,Place on bottom right frame,Add dropshadow
Copy and paste Lovey(turtle),Resize 25%,Place in the right frame,Add dropshadow
Copy and paste Dovey(frog),Resize 25%,Place in left frame,Add dropshadow
Hide white background layer by clicking on the eye in your layer palette
Merge other layers visible and Rename Frame
Unhide white background layer by clicking on the eye again
Copy and paste CBkg8,Resize 70%,Apply mask of choice,Merge group on mask layer
Copy and paste CBkg14,Resize 65%,Apply same mask as before,Merge Group on mask layer
Copy and paste leaves,Resize 40%,Place behind frame layer
Add dropshadow,Duplicate,Image,Mirror
Duplicate leaves again,Image,Flip
Duplicate 1 more time,Image,Mirror
Copy and paste LaceRibbon4,Resize 30%,Place at the bottom of your tube
(See mine for reference)
Use your deform tool to push it in a bit
Add your Name and CopyRight Info Now!
All done,Hope you enjoyed my tut:)
Labels:
MY TUTORIALS
|
0
comments
Spring Flowers
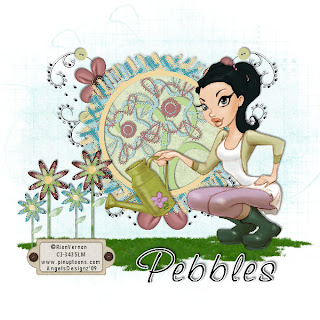 ll of my tutorials require a working knowledge of PSP!This tutorial was written by me on April 19,2009. It is of my own ideas and creation! Any other tutorials found to be similar is coincidental.
Supplies Needed
Scrapkit of Choice
I'm using a Wonderful kit called Spring Flowers,made by Pebbles @ Designs by Pebbles. This is a PTU kit i cannot supply. You can purchase her kit here
Tube of Choice
I'm using the Wonderful work of Rion Vernon aka Pinup Toons. You must have a license to use his work! You can purchase that here
Mask of Choice
Let's Begin
Open new image 600x600,Flood fill white
Copy and paste frame5,Resize 15%
Copy and paste tube choice,Resize 70%,Add dropshadow of choice
Copy and paste Spring3(Green paper),Resize 15%
Highlight the frame layer,Find your magic wand tool
Click on the inside of the frame with the magic wand,(You will see marching ants on the inside of your frame)
Selections,Modify,Expand by 3,Selections,Invert
Highlight paper layer,Hit delete on your keyboard
Selections,Select none,Move paper below frame layer
Add dropshadow to your frame layer
Copy and paste spring_flower1,Resize 15%
Place this below your frame layer,(See mine for reference)
Add dropshadow of choice
Copy and paste fallflower2,Resize 10%,(See mine for placement)
Copy and paste fallflower1,Resize 7%,Place by the other one,Add dropshadow to both
Copy and paste floralspray1,Resize 15%,(See mine for placement)
Add a light dropshadow to it,Duplicate,Image,Mirror
Layers,New Raster layer,Find your picture tube tool
Find the lawn tube,on your new raster layer add some lawn to your tag,(See mine for reference)Copy and paste tag2,Resize 15%,Place at the bottom of the flowers
Add a light dropshadow
Duplicate the 2 fallflowers,Place like mine or to your liking
Copy and paste paper5a,Resize 15%
Apply mask of choice,Merge Group on mask layer
Duplicate,Move to the right a bit
Add Your Name and CopyRight Info!
That's all,Hope you enjoyed my tut:)
Labels:
MY TUTORIALS
|
0
comments
Easter Fun
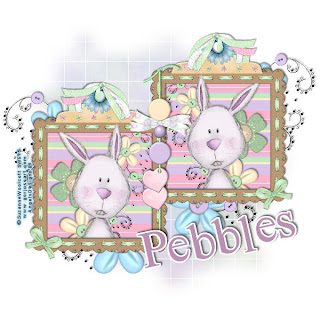 All of my tutorials require a working knowledge of PSP!This tutorial was written by me on April 19,2009. It is of my own ideas and creation! Any other tutorials found to be similar is coincidental.
Supplies Needed
Scrapkit of Choice
I'm using a Wonderful kit called Easter,made by Pebbles @ Designs by Pebbles. This is a PTU kit i cannot supply. You can purchase her kit here
Tube of Choice
I'm using the Wonderful work of Suzanne Woolcott. You must have a license to use her work! You can purchase that here
Mask of Choice
Let's Begin
Open new image 600x600,Flood fill white
Copy and paste fancy frame green,Resize 10%
Copy and paste paper stripped 3,Resize 10%
Highlight your frame layer on the right
Find your magic wand tool,Click on the inside of the frame(You will see marching ants),Selections,Modify,Expand by 3
Selections,Invert
Highlight your paper layer and hit delete on your keyboard
Selections,Select none,Move paper layer below your frame layer
Copy and paste tube of choice,Resize to your liking
Place in the frame,once happy with placement,Duplicate
Move the original below the frame layer
Find your eraser tool and erase the bottom part of the tube on the duplicated layer
Add dropshadow of choice to the original tube layer
Copy and paste flower string3,Resize 10%
Move this layer below your frame and tube layer,(See mine for reference)
Add dropshadow of choice
Copy and paste clip 1,Resize 15%
Place at the top of the frame,Add dropshadow of choice
Add dropshadow to your frame,Hide the white background layer by clicking on the eye on the right
Merge layers visible,Unhide white background layer by clicking on the eye again
Duplicate merged layer,Image,Mirror
Move to your liking or see mine for placement
Copy and paste elastic ribbon2,Resize 15%
Place in the middle of the 2 frames,(See mine for placement),Add dropshadow
Copy and paste flower string 4,Resize 15%
Place behind the merged layers,(See mine for reference)
Add dropshadow,Duplicate,Image,Mirror,(See mine for placement on this one)
Copy and paste paper4,Resize 15%
Apply mask of choice,Merge Group on mask layer
Add your Name and Copyright Info!!
That's it,Hope your enjoyed my tut:)
Labels:
MY TUTORIALS
|
0
comments
Newest Blinkie 4/18/09
This Blinkie was made for one of my besties! Check out his blog HERE
Labels:
CUSTOM SERVICES
|
0
comments
4 The Girls
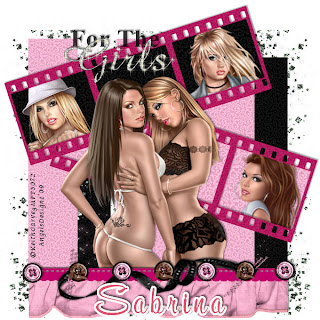 All of my tutorials require a working knowledge of PSP!This tutorial was written by me on April 13,2009. It is of my own ideas and creation! Any other tutorials found to be similar is coincidental.
Supplies Needed
Scrapkit of Choice
I'm using a Wonderful kit called 4 The Girls,made by Sabrina @ The Drama Queen's Scraps. This is a PTU kit i cannot supply. You can purchase her kit here
Tube of Choice
I'm using the Wonderful work of Keith Garvey. You must have a license to use his work! You can purchase that here
Mask of Choice
Let's Begin
Open new image 600x600,Flood fill white
Copy and paste filmframe3,Resize 20%
Take your deform tool and rotate it a bit,(See mine for reference)
Duplicate,Image,Mirror,Move down a bit,(See mine for reference again)
Copy and paste paper1,Resize 20%
Take your magic wand tool,click inside each square on the original filmstrip layer(top one)Selections,Modify,Expand 3
Selections,Invert
Highlight paper layer and hit delete on your keyboard
Selections,Select none
Move paper below all layer except the whitebackground layer
Do the same as above to the bottom filmstrip but use paper3
Now pick out some tubes all by the same artist of your choice
Copy and paste your main tube,Resize 80%,Add a dropshadow
Copy and paste another tube of choice
Use your deform tool and rotate it a bit,place under the top filmstrip,(See mine for placement)Click inside the far right square on the top filmstrip
Selections,Modify,Expand by 3
Selections,Invert
Highlight tube layer,hit delete on your keyboard
Selections,Select none
Move tube under the filmstrip layer but above the black paper
Do the same as above only using different tubes,in the other squares
Copy and paste paper1,Resize 15%,Move below all layers but above white background layer
Apply mask of choice,Merge Group on mask layer
Copy and paste paper3,Resize 15%
Apply same mask as before,Merge Group on mask layer
Move this layer above the other mask layer,(See mine for reference)
Copy and paste Ruffle2,Resize 15%
Move down to the bottom of your tube,Use your deform tool,Move the ruffles sides in to the mask
Copy and paste wordart,Resize 20%,(See mine for placement),add dropshadow
Copy and paste button 1,2,Resize 15%,(See mine for placement)
Duplicate each button a few times till you get what i have at the bottom
Copy and paste Sidder4,Resize 15%,Place down on top of the ruffle
Take your deform tool and stretch it out
Copy and paste glittercascadeblack,Resize 15%
Place behind the masks,Duplicate,Image Mirror,Duplicate,Move this one into the middle of the 2
Add Your name and CopyRight Info!
All Done,Hope your enjoyed my tut!!
Labels:
MY TUTORIALS
|
0
comments
Pixie Magic
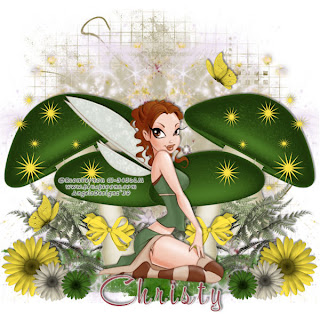
All of my tutorials require a working knowledge of PSP!This tutorial was written by me on April 12,2009. It is of my own ideas and creation! Any other tutorials found to be similar is coincidental.
Supplies Needed
Scrapkit of Choice
I'm using a Wonderful kit called Fairy Utopia,made by Silent Dreamer. This is a PTU kit i cannot supply. You can purchase her kit here
Tube of Choice
I'm using the Wonderful work of Rion Vernon aka Pinup Toons. You must have a license to use his work! You can purchase that here
Mask of Choice
Let's Begin
Open new image 600x600,Flood fill white
Copy and paste Mushrooms,Resize 70%
Add dropshadow,Duplicate,Image,Mirror
Copy and paste tube of choice,Resize 70%
Place in the center of the 2 mushrooms like mine
Add dropshadow of choice
New Raster layer,Find your picture tube tool
Find the lawn tube,and add some to the new raster layer(See mine for reference)
Copy and paste fairydustred,Resize to your liking
Place behind the mushrooms,(See mine for reference)
Duplicate,Image,Mirror
Copy and paste fairydustyellow,Resize 80%,(See mine for placement)Duplicate,Image,Mirror
Copy and paste butterflyyellow,Resize 20%
Add dropshadow,Place to your liking
Duplicate,Image,Mirror,Place in another spot
Copy and paste daisyyellow,Resize 30%
Place on bottom left corner of tag
Add dropshadow,Duplicate,Image,Mirror
Do the same with fairydaisy,only this time resize 20%
Copy and paste fairydaisygreen,Resize 15%
Place down by the other daisy's
Add dropshadow,Duplicate,Image,Mirror
Copy and paste ppfloralgold,Resize 65%
Apply mask of choice,Merge group on mask layer
Copy and paste fairysparklesyellow,Resize 30%
Place on the mushrooms
Add dropshadow,Duplicate,Image,Mirror
Copy and paste fairybowyellow,Resize 20%
Place on the stem of the mushroom
Add dropshadow,Duplicate,Image,Mirror
Add Your Name and CopyRight Info!
All done,Thanks for trying my tut:)
Labels:
MY TUTORIALS
|
0
comments
Only Me
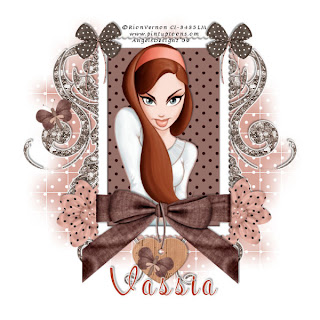 All of my tutorials require a working knowledge of PSP!This tutorial was written by me on April 12,2009. It is of my own ideas and creation! Any other tutorials found to be similar is coincidental.
Supplies Needed
Scrapkit of Choice
I'm using a Wonderful kit called Stay In Touch,made by Vassia's Designs. This is a PTU kit i cannot supply. You can purchase her kit here
Tube of Choice
I'm using the Wonderful work of Rion Vernon aka Pinup Toons. You must have a license to use his work! You can purchase that here
Mask of Choice
Let's Begin
Open new image 600x600,Flood fill white
Copy and paste frame3,Resize 80%
Copy and paste tube of choice,Resize if needed
Duplicate,Move the original below the frame layer
Take your eraser tool,remove parts of the tube hanging over the bow at the bottom of the frame
Add dropshadow to the original tube layer
Highlight raster 1
Copy and paste paper 5,Resize 70%
Highlight your frame layer
Take your magic wand tool,click on the inside of the frame layer
(Make sure you click in the smaller areas also)
Selections,Modify,Expand by 6
Selections,Invert
Highlight paper layer,Hit delete on your keyboard
Selections,Select none
Add a dropshadow to your frame layer
Copy and paste paper8,Resize 75%
Apply mask of choice,Merge Group on mask layer
Move below all layers but above white background
Copy and paste doodle,(See mine for placement)
Add dropshadow,Duplicate,Image,Mirror
Copy and paste bow 4,Resize 30%
Place on top left corner of frame
Add dropshadow,Duplicate,Image,Mirror
Copy and paste flower3,Resize 50%
Add dropshadow,Take your deform tool and rotate the flower a little
Duplicate,Image,Mirror
Copy and paste butterfly3,Resize 20%
Take your deform tool and rotate the butterfly a little
Place down by the heart,Duplicate,Image,Mirror
Move to top left of frame,(See mine for reference)
Add your name and Copyright info!
That's it,hope you enjoyed my tut!
Labels:
MY TUTORIALS
|
0
comments
I Wanna Be A RockStar
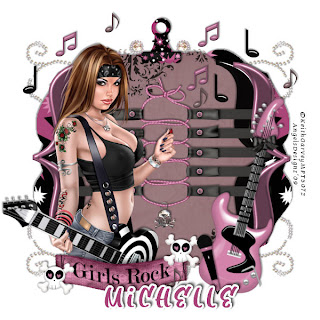 All of my tutorials require a working knowledge of PSP!This tutorial was written by me on April 5,2009. It is of my own ideas and creation! Any other tutorials found to be similar is coincidental.
Supplies Needed
Scrapkit of Choice
I'm using a Wonderful kit called Glam Rock,made by Michelle @ Candy Kisses Designz. This is a PTU kit i cannot supply. You can purchase her kit here
Tube of Choice
I'm using the Wonderful work of Keith Garvey. You must have a license to use his work! You can purchase that here
Let's Begin
Open new image 600x600,Flood fill white
Copy and paste BracketFrame,Resize 70%
Copy and paste paper12,Resize 70%,Add dropshadow to the paper
Move under the bracketframe
Highlight bracketframe,Click inside with your magic wand tool
Selections,Modify,Expand by 5Selections,Invert
Highlight paper layer,Hit delete on your keyboard
Selections,Select none
Do the same as above with paper10
Delete the bracketframe
Copy and paste Brackets3,Take your selection tool,Draw around the one on the right
Copy and paste as new layer on your canvas,Place on left side of paper
Add dropshadow of choice,Duplicate,Image,Mirror
Copy and paste the brackets(Black set),Take your selection tool and draw around 1
Copy and paste as new layer on your canvas,Add dropshadow
(See mine for placement),Duplicate,Image,Mirror
Copy and paste tube of choice,Resize around 80%,Add dropshadow
Copy and paste tied ribbon with skull,Resize 40%,(See mine for placement)
Add light dropshadow
Copy and paste Guitar,Resize 30%(See mine for placement)
Image,Rotate,Free Rotate 15.00,Right
Add dropshadow of choice
Copy and paste bling2,Resize 60%
Place at the bottom of the tag,below all layers but above white background
Duplicate,Image,Mirror,Merge these layers together
Duplicate,Image,Flip,(See mine for reference)
Copy and paste binderclip,Resize 30%
Place in the center at the top of the tag,(See mine for reference)
Add dropshadow
Copy and paste tag1,Resize 60%
Place at the bottom of the tag,Add dropshadow
Copy and paste Skull,Resize 20%
Place on the left corner of the tag1,Add dropshadow
Duplicate,Image,Mirror
Copy and paste microphone,Resize 30%,Image,Rotate,Free Rotate,15.00,Left
Add a dropshadow,Place down by the guitar
Copy and paste music notes of choice,Resize 30%
Add dropshadow and place to your liking
Duplicate as many times as u like and place in various spots
Add a bow of choice,Resize 30%,Place on the guitar,add dropshadow
Add your name and copyright info!
~That's it,Ty for checking out my tut~
Labels:
MY TUTORIALS
|
0
comments
Shine On Me
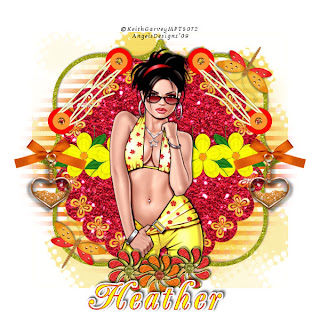
All of my tutorials require a working knowledge of PSP!This tutorial was written by me on April 5,2009. It is of my own ideas and creation! Any other tutorials found to be similar is coincidental.
Supplies Needed
Scrapkit of Choice
I'm using a Wonderful kit called Sunset Made by HezaScraps. This is a PTU kit i cannot supply. You can purchase her kit here
Tube of Choice
I'm using the Wonderful work of Keith Garvey. You must have a license to use his work! You can purchase that here
Mask of Choice
Let's Begin
Open new image 600x600
Flood fill white
Copy and paste Glitter Bracket,Resize 15%
Add a light dropshadow
Copy and paste Glitter Mat,Resize 90%
Copy and paste tube of choice,Resize around 80%
Add a dropshadow of choice
Copy and paste Glitter flower,Resize 15%
Place at the bottom of your tube
Copy and paste Glitter Flower2,Resize 15%
Place next to the other one
Duplicate the first one and move over to the other side of glitter flower2
(See mine for reference)
Add dropshadow to the first one
Click on the next one and hold down Ctrl and hit Y,(It adds dropshadow to the next one)
Do the same for the 3rd glitter flower
Copy and paste paper15,Resize 60%
Apply mask of choice,Merge group on mask layer
Take your deform tool,Stretch the mask out Copy and paste paper7,Resize 60%
Apply another mask of choice,Merge group on mask layer
Hide the first mask layer by clicking on the eye to the right in your psp
Take your deform tool again,Stretch out your mask
Once happy,Unhide your first mask
Copy and paste Charm2,Resize 30%
(See mine for placement),Duplicate,Image,Mirror
Copy and paste fastener,Resize 10%
Add dropshadow,Image,Flip
Place on top left,(See mine for reference)
Duplicate,Image,Mirror
Copy and paste dragonfly2,Resize 10%
Add dropshadow,Place at bottom left of tag
Duplicate,Image,Mirror,Image,Flip
Copy and paste Flower7,Resize 10%
(See mine for placement),Add dropshadow
Duplicate,Image,Mirror
Duplicate a few times and place next to the others
Add Your Name and CopyRight Info!
~That's it,Ty for trying my tutorial~
Labels:
MY TUTORIALS
|
0
comments
Easter 2009
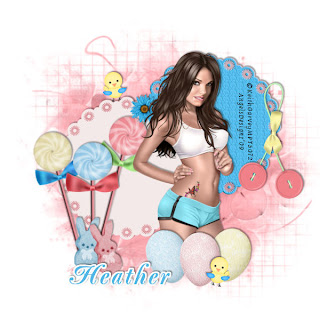 All of my tutorials require a working knowledge of PSP!This tutorial was written by me on April 4,2009. It is of my own ideas and creation! Any other tutorials found to be similar is coincidental.
Supplies Needed
Scrapkit of Choice
I'm using a Wonderful kit called Bunny Poop Made by HezaScraps. This is a PTU kit i cannot supply. You can purchase her kit here
Tube of Choice
I'm using the Wonderful work of Keith Garvey. You must have a license to use his work! You can purchase that here
Mask of Choice
Let's Begin
Open new image 600x600
Flood fill white
Copy and paste Mat 1,2
Resize 60%,Place to your liking,Add dropshadow
Copy and paste tube of choice,Resize around 70%
Add a dropshadow of choice,Place towards bottom of the mats
Copy and paste paper2,Resize 70%
Apply mask of choice,Merge group on mask layer
Take your deform tool and stretch the mask out a little bit
Copy and paste peep bunny 1,Resize 20%
(See mine for placement),Add dropshadow
Copy and paste peep bunny2,Resize 20%
Place down by the other peep bunny,Image,Rotate,Free Rotate 15.00,Left
Add a dropshadow
Copy and paste taffy3,Resize 60%
(See mine for placement),Add dropshadow
Image,Rotate,Free Rotate,15.00,Left
Copy and paste taffy2,Resize 60%
Add dropshadow,Place next to taffy3
Copy and paste taffy1,Resize 60%
Add dropshadow,Image,Rotate,Free Rotate,15.00,Right
(See mine for placement)
Copy and paste Egg3,Resize 20%
Image,Rotate,Free Rotate,15.00,Left
Add a dropshadow of choice,(See mine for placement)
Copy and paste egg1,Resize 20%
Add dropshadow and place next to egg3
Copy and paste Egg,Resize 20%
Add dropshadow,Image,Rotate,Free Rotate,15.00,Right
Place next to egg1
Copy and paste bow6,Resize 30%
Place on the mat to the right,Add dropshadow
Copy and paste fastener3,Resize 60%
Add dropshadow,(See mine for placement)
Copy and paste Bird2,Resize 15%
Add dropshadow and place on top of the mat
Duplicate,Image,Mirror,Move down by the eggs
Copy and paste flower3,Resize 15%
Place to your liking and add a dropshadow
Add your name and copyright info now!
~That's it,Hope you liked my tutorial~
Labels:
MY TUTORIALS
|
0
comments
Sexy Lil Pixie
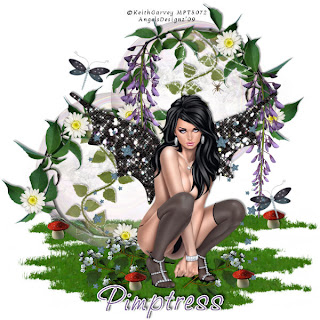
All of my tutorials require a working knowledge of PSP!This tutorial was written by me on April 2,2009. It is of my own ideas and creation! Any other tutorials found to be similar is coincidental.
Supplies Needed
Scrapkit of Choice
I'm using a Wonderful kit called Mid-Summer Night,made by Pimp'd Dezigns. This is a PTU kit i cannot supply. You can purchase her kit here
Tube of Choice
I'm using the Wonderful work of Keith Garvey. You must have a license to use his work! You can purchase that here
Let's Begin
Open new image 600x600
Flood fill white
Copy and paste tube of choice,Resize around 70%
Copy and paste glitter-wings-01,Resize 65%
Place behind your tube so it looks like she has wings on(See mine for reference)
Merge the glitter-wings and tube of choice together
Add dropshadow of choice
Copy and paste bubble-01,Resize 65%
Place towards the left of your tube
Duplicate,Move this one up and to the right(See mine for reference on the 2)
Copy and paste green-08,Resize 65%
Place on bottom bubble,(See mine for reference)
Duplicate,Image,Mirror,Place on the top bubble
Add a light dropshadow to both
Copy and paste climbing-vine,Resize 30%
Place under the bubble,(See mine for reference)
Duplicate,Image,Mirror,Image,Flip
Do the same with the 2nd bubble,Add dropshadow
Add a New Raster Layer.
Click on your tube tool,Find the lawn tube
On the new raster layer,add a little bit of grass to your tag(See mine for reference)
Copy and paste toadstool,Resize 10%
Add dropshadow,Place to your liking
Duplicate a few times and place in various spots
Copy and paste flower-01,Resize 30%(See mine for placement)
Adjust,Sharpness,Sharpen
Add a dropshadow of choice
Duplicate,Image,Mirror
Duplicate again,only this time pull up and over a bit
Copy and paste flower-04,Resize 40%
Place to your liking,Duplicate,Image,Mirror,Place this one to your liking also
Copy and paste cloud,Move behind the bubble
Duplicate,Image,Mirror,Move this on behind the bottom bubble
Copy and paste dragonfly,Resize 20%
Image,Rotate,Free Rotate 15.50,Right
Place to your liking
Duplicate,Image,Mirror,move down towards the grass
Copy and paste the spiderweb,Resize 30%
Place on top bubble
Copy and paste spider,Resize 10%,Place on the web
Copy and paste stars02,Resize 30%
Place on the glitter wing on the right side
Duplicate,Image,Mirror
Now Add your name and copyright info!~
That's it,Thanks for trying my tutorial~
Labels:
MY TUTORIALS
|
0
comments
Sweet-Tart
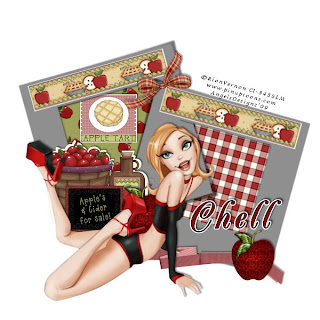 All of my tutorials require a working knowledge of PSP!This tutorial was written by me on April 2,2009. It is of my own ideas and creation! Any other tutorials found to be similar is coincidental.
Supplies Needed
Scrapkit of Choice
I'm using a Wonderful kit called Apple Of My Eye,made by Arkansas Outhouse Scraps. This is a PTU kit i cannot supply. You can purchase her kit here
Tube of Choice
I'm using the Wonderful work of Rion Vernon aka Pinup Toons. You must have a license to use his work! You can purchase that here
Mask of Choice
Let's Begin
Open new image 600x600
Flood fill white
Copy and paste tube of choice,Resize to your liking
Copy and paste frame5,Resize 30%
Image,Rotate,Free Rotate 15.50,Left
Duplicate,Image,Mirror(See mine for placement)
Copy and paste pp8
Image,Rotate,Free Rotate 15.50,Left
Place it on the left frame so it fits nicely,then move below frame
Do the same as above only this time using pp16
And Rotate it to the Right this time
Copy and paste basket sticker2,Resize 50%
(See mine for placement),Add a dropshadow of choice
Copy and paste border,Resize 30%
Image,Rotate,Free Rotate 15.50,Left
Duplicate,Image,Rotate,Free Rotate 15.50,Right
Adjust,Sharpness,Sharpen
Image,Rotate,Free Rotate15.50,Right
Place on top of other frame
Copy and paste apple,Resize 10%
Place on the bottom right frame,Add dropshadow
Duplicate,Move this over by the basket sticker 2
Copy and paste apple tart stamp sticker,Resize 50%
(See mine for placement),Add dropshadow
Copy and paste ribbon,Resize 30%
(See mine for placement),add dropshadow
Copy and paste bow6,Resize 15%
Place in the middle of the frames
(See mine for reference),Add a dropshadow
Add Your Name and Copyright info!
That's it,Hope you enjoyed my tut!
Labels:
MY TUTORIALS
|
1 comments
Dream Of Me
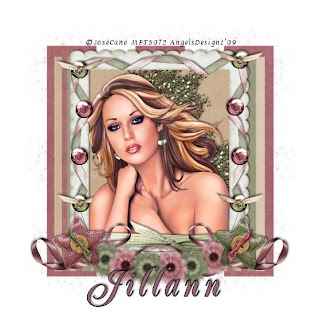 All of my tutorials require a working knowledge of PSP!This tutorial was written by me on April 2,2009. It is of my own ideas and creation! Any other tutorials found to be similar is coincidental.
Supplies Needed
Scrapkit of Choice
I'm using a Wonderful kit called Not Too Shabby,made by Jillann @ Jillann's Creations. This is a PTU kit i cannot supply. You can purchase her kit here
Tube of Choice
I'm using the Wonderful work of Jose Cano. You must have a license to use his work! You can purchase that here
Mask of Choice
Let's Begin
Open new image 600x600
Flood fill white
Copy and paste frame1,Resize 60%
Copy and paste tube of choice,(Better to use a tube w/ no bottom half)
Place in frame,(See mine for reference)
Copy and paste paper04,Resize 60%
Place this below the frame layer
Highlight your frame layer,Click inside with your magic wand tool
Selections,Modify,Expand by 6
Selections,Invert
Highlight your paper layer and hit delete on your keyboard
Selections,Select none
Copy and paste glitter mess,Resize 40%
Place below tube and frame layer,(See mine for reference)
Duplicate,Move this one down a bit,(See mine for placement)
Add a light dropshadow to both
Copy and paste RibbonWrap1,Resize 40%
Place on the bottom of frame,Take your deform tool,Stretch the wrap across the bottom of the frame
Add a dropshadow of choice
Copy and paste ribbon2,Resize 40%
Place on top of the frame,(See mine for reference)
Take your deform tool again,Move the ribbon in this time
Add a dropshadow of choice
Duplicate,Image,Rotate,Free Rotate 90.00 Left
Place on the frame,Duplicate,Image,Mirror
Copy and paste SilkStar 1,2Resize 40%
Put the the silkstar 2 on the bottom right of the frame
On the silkstar1,Image,Mirror,Place on bottom left side of frame
Add dropshadow of choice to both
Copy and paste gem3,Resize 40%
Place on top left side of ribbon
Add dropshadow of choice,Duplicate,Image,Mirror
Copy and paste gem2,Resize 40%
Place on the frame,Add dropshadow,Duplicate,Image Mirror
Do this a few more times with gem2
Copy and paste gem3 again,Resize 40%
Place on frame,(See mine for placement),Duplicate,Image,Mirror
Copy and paste Ribbon3,Resize 40%
Place under the star on the right side,(See mine for reference)
Add a dropshadow,Duplicate,Image,Mirror
Merge these 2 together
Copy and paste flower 1,2Resize 20%,(see mine for placement)
Add a dropshadow,Duplicate both flowers a few times,place to your liking
Copy and paste bow2,Resize 30%
Place on top 2 gems at the top of the frame,Duplicate these 2
Move them both down to the gems at the bottom of the frame,(see mine for reference)
Copy and paste paper3,Resize 70%
Apply mask of choice,Merge Group on mask layer
Copy and paste paper6,Resize 65%
Apply same mask as before,Merge Group on mask layer
Add your Name and CopyRight info!!
That's it,Ty for trying my tut.
Labels:
MY TUTORIALS
|
0
comments
Seduce Me

All of my tutorials require a working knowledge of PSP!This tutorial was written by me on April 2,2009. It is of my own ideas and creation! Any other tutorials found to be similar is coincidental.
Supplies Needed
Scrapkit of Choice
I'm using a Wonderful kit called Deep Seduction,made by Jo @ Creationz by Jo. This is a PTU kit i cannot supply. You can purchase her kit here
Tube of Choice
I'm using the Wonderful work of Rion Vernon aka Pinuptoons. You must have a license to use his work! You can purchase that here
Mask of Choice
Let's Begin
Open new image 600x600
Flood fill white
Copy and paste frame Three
Resize 40%
Copy and paste tube of choice,Move below the frame
Once happy with placement,Take your magic wand tool
Click inside the frame
Selections,Modify,Expand by 5
Selections,Invert
Highlight your tube layer and hit delete on your keyboard
Selections,Select none
Do the same as above only this time using paper12
Add a dropshadow to your tube
Hide the white background layer by clciking on the eye in your layers on the right
Merge all other layers visible
Unhide your white background layer by clicking on the eye again
Add dropshadow to your frame layer
Image,Rotate,Free Rotate 15.50,Left
Copy and paste another tube of choice
Resize to your liking,add a dropshadow to it
Copy and paste journal tag,Resize 50%
(See mine for placement),Add a dropshadow
Copy and paste stitched heart,Resize 30%
(See mine for placement),Add a dropshadow of choice
Copy and paste flowers,2Resize 20%,Add dropshadow to both,(See mine for placement)
Copy and paste Crochet bow2,Resize 15%
Add dropshadow,Place on the bottom of the journal tag(See mine for reference)
Copy and paste flutter4,Image,Rotate,Free Rotate 22.50,Left
Image,Mirror,Add dropshadow and place to your liking
Copy and paste flutter6,Resize 10%
Place on the left side of the frame
Copy and paste Tag2,Resize 10%,(See mine for placement)
Add a light dropshadow
Copy and paste loveheart3,Resize 15%,Place on top left corner
Add a dropshadow of choice
Copy and paste paper3,Resize 80%
Apply mask of choice,Merge Group on mask layer
Add Your Name and Copyright Info Now!
All Done,Thanks for trying my tutorial
Labels:
MY TUTORIALS
|
0
comments
Newest Blinkie 4/1/09
This Blinkie was made for Linda @ MrsJaybob Designs. Check out her blog HERE
Labels:
CUSTOM SERVICES
|
0
comments
Subscribe to:
Posts (Atom)
Blog Archive
-
▼
2009
(333)
-
▼
April
(30)
- Girlie Girl
- Ocean Dreams
- Newest Blinkie 4/23/09
- More New Blinkies 4/21/09
- Newest Blinkies 4/21/09
- Sweet On Me
- Spring Flowers
- Easter Fun
- Newest Blinkie 4/18/09
- Newest Kit~SunFlowers~4/16/09
- Newest Kit 4/14/09
- 4 The Girls
- Pixie Magic
- Only Me
- Newest Blinkie 4/12/09
- Newst Blinkie 4/9/09
- Newest Blinkies 4/8/09
- I Wanna Be A RockStar
- Shine On Me
- Easter 2009
- Newest Blinkie 4/4/09
- Newest Animated Banners 4/4/09
- Some More New Blinkies 4/3/09
- Newest Blinkies 4/3/09
- Sexy Lil Pixie
- Sweet-Tart
- Dream Of Me
- Seduce Me
- Newest Blinkie 4/1/09
- Newest Animated Banners 4/1/09
-
▼
April
(30)
