CHAT TO ME
MY TERMS
All of my ideas are copyrighted to me as they are my original designs. Any resemblence to any other tutorial is purely coincidental.
Do Not Translate, copy, email, download (ie; save to your own hard drive) distribute and/or make scripts/ quick guides from my tutorials.
Do Not hot link to my images or files.
Do Not upload my files to any other site. Do not share my files with others, as some of the contents require permission from thier creators to be shared.
If you are a group manager & wish to use my tutorials in your challenges, you must email me for permission BEFORE you link to my site. I reserve the right to join any group that links to my site.
VISITORS
Labels
- Awards (12)
- CT TUTORIALS (312)
- CUSTOM SERVICES (148)
- Freebies (64)
- MY TUTORIALS (299)
- PTU CU (12)
- ScrapKits (152)
- TAGS (9)
Blog Archive
Thoughts Of You
All of my tutorials require a working knowledge of PSP!
This tutorial was written by me on December 30,2008. It is of my own ideas and creation! Any other tutorials found to be similar is coincidental.
This tutorial was written by me on December 30,2008. It is of my own ideas and creation! Any other tutorials found to be similar is coincidental.
Supplies Needed
Scrapkit of Choice
I'm using a Beautiful kit called True Love made by Millie @ CM Designs. You can purchase this beautiful kit here
Tube of Choice
I'm using the Wonderful work of Jennifer Janesko. You must have a license to use her work,You can purchase that here
Let's Begin
Open New Image 600x600
Flood fill white
Find the Envelope2
Copy and paste as new layer
Resize 60%
Add a dropshadow of choice
Find your tube of choice
Copy and paste
Resize as needed(If using the same tube as me,resize 80%)
Add a dropshadow of choice
Find the Noeud4
Copy and paste
Resize 60%
Place like mine
Copy and paste the fleurclip2
Resize 40%
Place ontop of the paper/envelope like mine
Find the white feather(plume)
Copy and paste as new layer
Resize 40%
Place like mine
Find the branches2
Copy and paste as a new layer
Resize 30%
Place on the right corner of the envelope(see minge for reference)
Image,Duplicate,Image,Mirror
Make sure it is behind the tube,and feather
Find the fleur
Go to Image,Rotate,Rotate clockwise 90
Copy and paste the fleur
Resize 30%
Place on top of the branches
Duplicate,Image,Mirror
Now add any extra elements of your choice
Add your name and copyright info.
Add a message to the paper of choice or a brush
All Done!!(Hope you enjoyed my tutorial)
Labels:
MY TUTORIALS
|
0
comments
Coffee Lover
All of my tutorials require a working knowledge of PSP!
This tutorial was written by me on December 30,2008. It is of my own ideas and creation! Any other tutorials found to be similar is coincidental.
This tutorial was written by me on December 30,2008. It is of my own ideas and creation! Any other tutorials found to be similar is coincidental.
Supplies Needed
Scrapkit of Choice
I'm using a Fabulous kit called Coffee Time,made by Judy @ Scraps in Your Pocket. You can purchase her kit here
Tube of Choice
I'm using the Wonderful work of Jennifer Janesko. You must have a license to use her work. You can purchase that here
Let's Begin!
Open New Image 600x600
Let's Begin!
Open New Image 600x600
Flood fill white
Find the photo mat
Find the photo mat
Copy and paste as new layer
Image,Rotate,Free Rotate 15.50,Left
Add a dropshadow of choice
Find your tube of choice
Copy and paste as a new layer and move to the left of the photo mat
Resize if needed(if using the same tube as me,resize 70%)
Add dropshadow of choice
Copy and paste the Cinnamon Stick as a new layer
Resize 30%
Add a dropshadow of choice
Place to the bottom right of the Photo mat
Copy and paste both coffee cups
Resize 30%
Place by the cinnamon stick
Add dropshadow of choice to both cups
Copy and paste the heart tag2
Resize 40%
Place behind the cinnamon stick,2 coffee cups
Find the Coffee stick box
Copy and paste
Resize 40%
Place like mine
Add a dropshadow of choice
Find the LoopButton & Tie
Image,Rotate,Rotate Clockwise 90
Copy and paste as new layer onto canvas
Resize 25%
Place on the heart tag2(See mine for reference)
Copy and paste the butterfly1
Resize 30%
Image,Rotate,Free Rotate 15.50,Right
Add a light dropshadow of choice
Copy and paste a coffee cup of choice
Resize 40%
Place down by the cinnamon stick box
Add a dropshadow of choice
Copy and paste bead set1
Resize 40%
Place down by the box
Copy and paste the Ribbon tie 1
Resize 30%
Place on top right corner of the photo mat
Now add a brush of choice or wording to the heart tag
Add name and Copyright Info!
All done,Hope you enjoyed my tutorial!
Labels:
MY TUTORIALS
|
0
comments
Strawberry Haven
All of my tutorials require a working knowledge of PSP!
This tutorial was written by me on December 28,2008. It is of my own ideas and creation! Any other tutorials found to be similar is coincidental.
This tutorial was written by me on December 28,2008. It is of my own ideas and creation! Any other tutorials found to be similar is coincidental.
Supplies Needed
Scrapkit of Choice
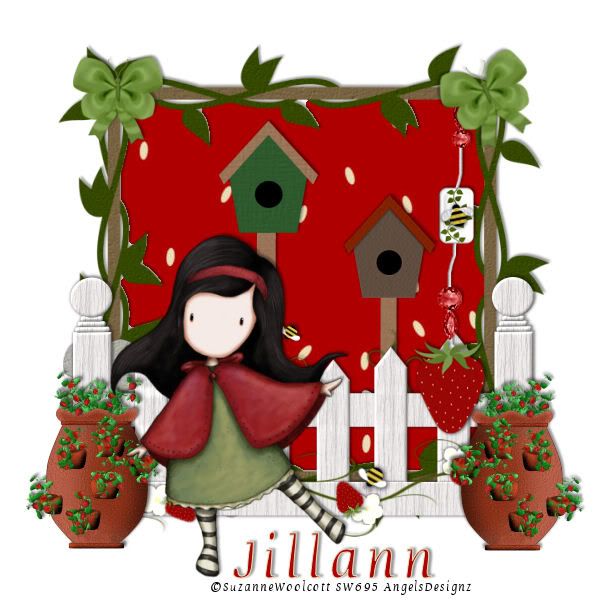
I'm using a Wonderful kit called Strawberry Garden made by Jillan @ Scraps & Bits by Jillann, You can purchase her kit here
Tube of Choice
Tube of Choice
I'm using the Wonderful work of Suzanne Woolcott. You must have a license to use her work. You can purchase that here
Let's Begin
Open New Image 600x600
Flood fill white
Copy and Paste the fence as a new layer
Copy and Paste the fence as a new layer
Move towards bottom of the tag
Copy and paste the tube of choice
Resize if needed
Add a dropshadow of choice
(If using the same tube as me,resize 80%)
Copy and paste frame 1
Copy and paste frame 1
Add a dropshadow of choice
Place behind the fence
Pick a paper of choice
Copy and paste
Grab your magic wand tool
Grab your magic wand tool
Click on the inside of the frame
Selections,Modify,Expand by 4
Selections,Invert
Highlight your paper layer
Hit delete on your keyboard
Selections, Select None
Move this layer below your frame layer
Copy and Paste the StrawberryDangle
Place on the right side of the frame
Add dropshadow of choice
Copy and Paste the StrawberryPot
Add dropshadow of choice
Image,Duplicate,Image,Mirror
Place under the strawberrydangle
Copy and paste both bird houses
Copy and paste both bird houses
Place behind the fence layer(See mine for reference)
Add a dropshadow of choice
Find the butterbows
Pick a color of choice(I'm using the LightGreen)
Resize 70%
Add a dropshadow of choice
Image,Duplicate,Image,Mirror
Image,Rotate,Free Rotate,22.50,Left
Add your Name and Copyright Info!!
All Done!(Hope you enjoyed my tutorial)
Add your Name and Copyright Info!!
All Done!(Hope you enjoyed my tutorial)
Labels:
MY TUTORIALS
|
1 comments
Beary 2009
All of my tutorials require a working knowledge of PSP!
This tutorial was written by me on December 28,2008. It is of my own ideas and creation! Any other tutorials found to be similar is coincidental.
This tutorial was written by me on December 28,2008. It is of my own ideas and creation! Any other tutorials found to be similar is coincidental.
Supplies Needed
Scrapkit of Choice
I'm using a Wonderful kit called BearysNewEve made by Chantal @ ChaDesignz. You can Purchase this wonderful kit here
Tube of Choice
Mask of Choice
Let's Begin
Open New Image 600x600Flood Fill white
Find the wordart1
Find the wordart1
Copy and paste as new layer
Move to top right corner a little bit
Find the frame3 Image,Mirror
Find the frame3 Image,Mirror
Copy and paste as new layer
Resize 40%
Image,Rotate,Free Rotate,22.50,Left
Pick a paper of choice
Pick a paper of choice
Copy and paste
Resize 80%
Add a Mask of choice
Move your frame3 over to the left of the paper
Move your paper layer below the wordart and frame but above your white background on your layer palette
Find the bear9
Move your frame3 over to the left of the paper
Move your paper layer below the wordart and frame but above your white background on your layer palette
Find the bear9
Copy and paste as a new layer
Resize 60%
Add a dropshadow of choice
Pick another paper of choice
Pick another paper of choice
Copy and paste as a new layer
Resize 70%
Place paper to where it is covering the whole frame
Grab your magic wand tool
Grab your magic wand tool
Highlight your frame layer
Click on the inside of the frame with your magic wand
Selections,Modify,Expand by 4
Selections,Invert
Now highlight your paper layer
Now highlight your paper layer
Hit delete on your keyboard
Selections,Select none
Move this paper layer below your frame layer
Find the bear6
Move this paper layer below your frame layer
Find the bear6
Copy and paste as new layer
Resize 70%
Image,Rotate,Free Rotate,22.50,left
Place the head of the bear to your liking on the top part of the frame
Grab your magic wand again
Click on the inside of the top part of the frame only
Selections,Modify,Expand by 4
Selections,Invert
Highlight bear6 layer
Highlight bear6 layer
Hit delete on your keyboard
Selections,Select none
Move the bear below the frame layer but above the paper layer
Add a drop shadow of choice
Do the Same as Above again with the bottom part of the frame (See mine for reference)
Hide all layers except the raster 3,8,7,6
Do the Same as Above again with the bottom part of the frame (See mine for reference)
Hide all layers except the raster 3,8,7,6
Layers,Merge,Merge Visable
Rename Frame
Resize 90%
Add a dropshadow of choice
Unhide all the other layers
Copy and paste 2009
Unhide all the other layers
Copy and paste 2009
Resize 60%
Place like mine
Add a dropshadow of choice
Copy and paste Sparkle3
Copy and paste Sparkle3
Resize 50%
Place below mask layer but above white background layer
Copy and paste the star1
Copy and paste the star1
Resize 30%
Place below the frame layer(See mine for reference)
Image,Duplicate
Drag the duplicated layer down to the bottom of the frame
Copy and paste the tag1
Copy and paste the tag1
Resize 50%
Place above the mask layer but below the wordart(See mine for reference)
Add dropshadow of choice
Now if using a tube,Place to your liking now
Add your name(I'm placing the name on the tag)
Now if using a tube,Place to your liking now
Add your name(I'm placing the name on the tag)
Add your Copyright info if you used a tube
Once happy with your tag,Save as a png or a Jpeg
All done!!(Hope your Enjoyed my Tutorial!)
Once happy with your tag,Save as a png or a Jpeg
All done!!(Hope your Enjoyed my Tutorial!)
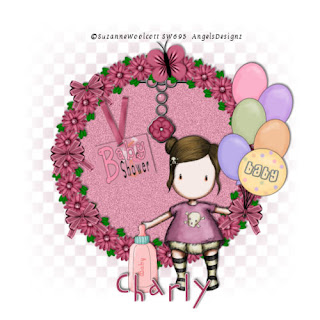
Baby Shower
All of my tutorials require a working knowledge of PSP!
This tutorial was written by me on December 16,2008.
This tutorial was written by me on December 16,2008.
It is of my own ideas and creation!
Any other tutorials found to be similar is coincidental.
Supplies Needed
Scrapkit of Choice~
Supplies Needed
Scrapkit of Choice~
I'm using a Wonderful kit called Baby Time made by Charly @ Country Hollow Scraps.
I'm using the Wonderful work of Suzanne Woolcott.
You must have a license to use her work.
Let's Begin
Open New Image 600x600Flood fill white
Copy and paste Image38
Resize 30%
Effects,Plugins,Mue Meisters-Copies with these settings
Encircle
Circle
Tile Mode
Behind
275
85
80
100-25
1000
1000
0
300
Rename this layer frame
Copy and paste paper3
Copy and paste paper3
Resize if needed
Place under the flower frame
Find your Magic wand tool
Find your Magic wand tool
Click inside the frame
Selections,Modify,Expand by 4
Selections,Invert
Highlight paper layer
Highlight paper layer
Hit delete on your keyboard
Selections,none
Add dropshadow of choice to your frame
Copy and paste tube of choice
Add dropshadow of choice to your frame
Copy and paste tube of choice
Resize if needed
Add dropshadow of choice
Place like mine
Copy and paste balloons
Copy and paste balloons
Resize 40%
Image,Rotate,Free Rotate, 12.00,Right
Place in the hand of your tube
Add dropshadow of choice
Copy and paste Image33
Copy and paste Image33
Resize 30%
Place on bottom of ballons like mine
Add dropshadow of choice
Duplicate image33
Duplicate image33
Image,Mirror
Place on frame like mine
Duplicate 2x's and place on frame like mine
Copy and paste image24
Copy and paste image24
Resize 50%
Drag below frame but above paper
Place at top of frame(See mine for reference)
Add a dropshadow of choice
Copy and paste Image27
Copy and paste Image27
Resize 30%
Image,Rotate,Free Rotate,12.00,Left
Place at top of frame
Add dropshadow of choice
Copy and paste babyshowertagGift
Copy and paste babyshowertagGift
Resize 30%
Image,Rotate,Free Rotate,14.00,Left
Add dropshadow of choice
Find the BabybottlePink
Find the BabybottlePink
Image,Rotate,Counterclockwise 90
Copy and paste
Resize 20%
Add dropshadow of choice
Add your name and copyright info
Add a mask of choice
~All done,Hope you enjoyed my tut~
Add dropshadow of choice
Add your name and copyright info
Add a mask of choice
~All done,Hope you enjoyed my tut~
Labels:
MY TUTORIALS
|
0
comments
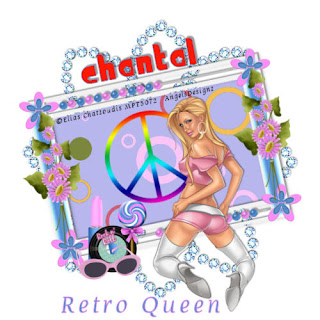
Retro Queen
All of my tutorials require a working knowledge of PSP!
This tutorial was written by me on December 16,2008.
This tutorial was written by me on December 16,2008.
It is of my own ideas and creation!
Any other tutorials found to be similar is coincidental.
Supplies Needed
Scrapkit of Choice~
Supplies Needed
Scrapkit of Choice~
I'm using an Amazing kit called Retro made by Chantal @ ChaDesignz,
I'm using the Wonderful work of Elias Chatzoudis.
You must have a license to use his work!
Resize 60%
Image,Rotate,Free Rotate 12.00 Left
Copy and paste tube of choice
Copy and paste tube of choice
Add dropshadow of choice
Copy and paste a paper of choice(I'm using paper1)
Copy and paste a paper of choice(I'm using paper1)
Place this below your frame
Find your magic wand and click on the inside of your frame
Find your magic wand and click on the inside of your frame
Selections,Modify,Expand by 8
Selections,Invert
Highlight your paper
Highlight your paper
Hit delete on your keyboard
Copy and paste button3
Copy and paste button3
Resize 20%P
lace on frame(See mine for reference)
Duplicate 3x's and place on the corners of the frame
Copy and paste flower3
Copy and paste flower3
Resize 30%
Rotate,Free Rotate 12.00,Left
DuplicateImage,Mirror
Copy and paste the flower bling of choice
Copy and paste the flower bling of choice
Resize if needed
Move below frame and paper
Add a dropshadow of choice
Copy and paste lollipop2
Copy and paste lollipop2
Resize 30%
Copy and paste glasses
Copy and paste glasses
Resize 30%
Copy and paste lipstick1
Copy and paste lipstick1
Resize 30%
Place these to your liking or like mine
Copy and paste the peace sign
Copy and paste the peace sign
Resize 50%
Image,Rotate,Free Rotate 12.00,Left
Place like mine
Copy and paste the disc
Copy and paste the disc
Resize 30%
Place to your liking
Add your name and CopyRight info
~All done,Hope you enjoyed my tut~
Add your name and CopyRight info
~All done,Hope you enjoyed my tut~
Labels:
MY TUTORIALS
|
0
comments
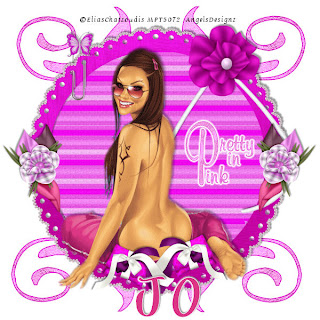
Glamorous In Pink
All of my tutorials require a working knowledge of PSP!
This tutorial was written by me on December 16,2008.
This tutorial was written by me on December 16,2008.
It is of my own ideas and creation!
Any other tutorials found to be similar is coincidental.
Supplies Needed
Scrapkit of Choice~
Supplies Needed
Scrapkit of Choice~
I'm using a Beautiful kit called Pretty in Pink made by Jo @ CreationzbyJo.
I'm using the Wonderful work of Elias Chatzoudis.
You must have a license to use his work! You can purchase that here
Let's Begin
Open New Image 600x600Flood fill white
Copy and Paste gemring2
Resize 50%
Copy and paste laced edge 3
Copy and paste laced edge 3
Resize 40%
Place below Gemring2
Highlight paper
Highlight paper
Hit delete on your keyboard
Add a dropshadow of choice to your frame
Copy and paste tube of choice
Copy and paste tube of choice
Resize if needed
Add dropshadow of choice
Copy and paste doodle
Copy and paste doodle
Resize if needed
Duplicate,Image,Mirror
Dulicate again,Image,Flip
Duplicate 1 more time,
Image,Mirror
Copy and paste the paperclip1
Copy and paste the paperclip1
Resize 20%
Duplicate,Drag original below the gemring2
Find your Eraser tool,
and on the duplicated paperclip
remove the top like mine
(It will look like the paperclip is holding the ring and laced edge together)
Copy and paste the cushion
Copy and paste the cushion
Resize 20%
Place on bottom of gemring
Duplicate,Image,Mirror
Drag cushion over by the other one
Add a dropshadow of choice to both of these
Copy and paste flower3
Copy and paste flower3
Resize 20%
Place on right side of frame
Add dropshdow of choice
DuplicateImage,Mirror
Copy and paste the Word(Pretty in Pink)
Copy and paste the Word(Pretty in Pink)
Resize 50%
Place on the laced edge
Add your name and copyright info
~All Done,Hope you enjoyed my tut~
Add your name and copyright info
~All Done,Hope you enjoyed my tut~
Labels:
MY TUTORIALS
|
0
comments
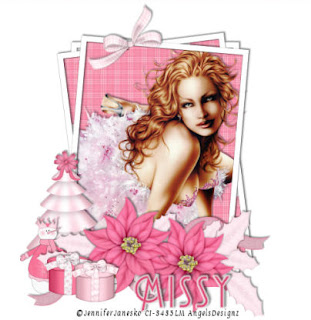
Cherish Me
All of my tutorials require a working knowledge of PSP!
This tutorial was written by me on December 16,2008.
This tutorial was written by me on December 16,2008.
It is of my own ideas and creation!
Any other tutorials found to be similar is coincidental.
Supplies Needed
Scrapkit of Choice~
Supplies Needed
Scrapkit of Choice~
I'm using a Beautiful kit called Snow Princess made by Missy @ Scraps with Attitude.
You can purchase this kit here
I'm using the Wonderful work of Jennifer Janesko.
You must have a license to use her work!
Resize 50%
Pick a paper of choice
Pick a paper of choice
Copy and paste
Grab your magic wand tool
Grab your magic wand tool
Click on the inside of your frame
Selections,Modify,Expand by 4
Selections,Invert
Highlight your paper
Highlight your paper
Hit delete on your keyboard
Selections,none
Drag paper below your frame
Pick your tube of choice
Pick your tube of choice
copy and paste
Place in the frame,
(you may have to use the magic wand tool,do the same way as above)
Add a dropshadow of choice
Find the flower bunch 1
Find the flower bunch 1
Image,Rotate,Rotate clockwise 90
Copy and paste
Resize 50%
Add dropshadow of choice
Copy and paste box1 and box2
Copy and paste box1 and box2
Resize 10%
Place like mine
Add a dropshadow of choice
Copy and paste bow2
Copy and paste bow2
Resize 15%
Place on the staple at the top of the frame
Add dropshadow of choice
Copy and paste Tree 2
Copy and paste Tree 2
Resize 30%
Place behind box1,2
Add dropshadow of choice
Copy and paste snowman1
Copy and paste snowman1
Resize 15%
Place behind box1,2 but in front of the Tree
Add a light dropshadow of choice
Add your name and copyright info
~All done,Hope you enjoyed my tut~
Add your name and copyright info
~All done,Hope you enjoyed my tut~
Labels:
MY TUTORIALS
|
0
comments
IPOD Friends
All of my tutorials require a working knowledge of PSP!
This tutorial was written by me on December 12,2008.
This tutorial was written by me on December 12,2008.
It is of my own ideas and creation!
Any other tutorials found to be similar is coincidental.
Supplies Needed
Scrapkit of Choice~
Supplies Needed
Scrapkit of Choice~
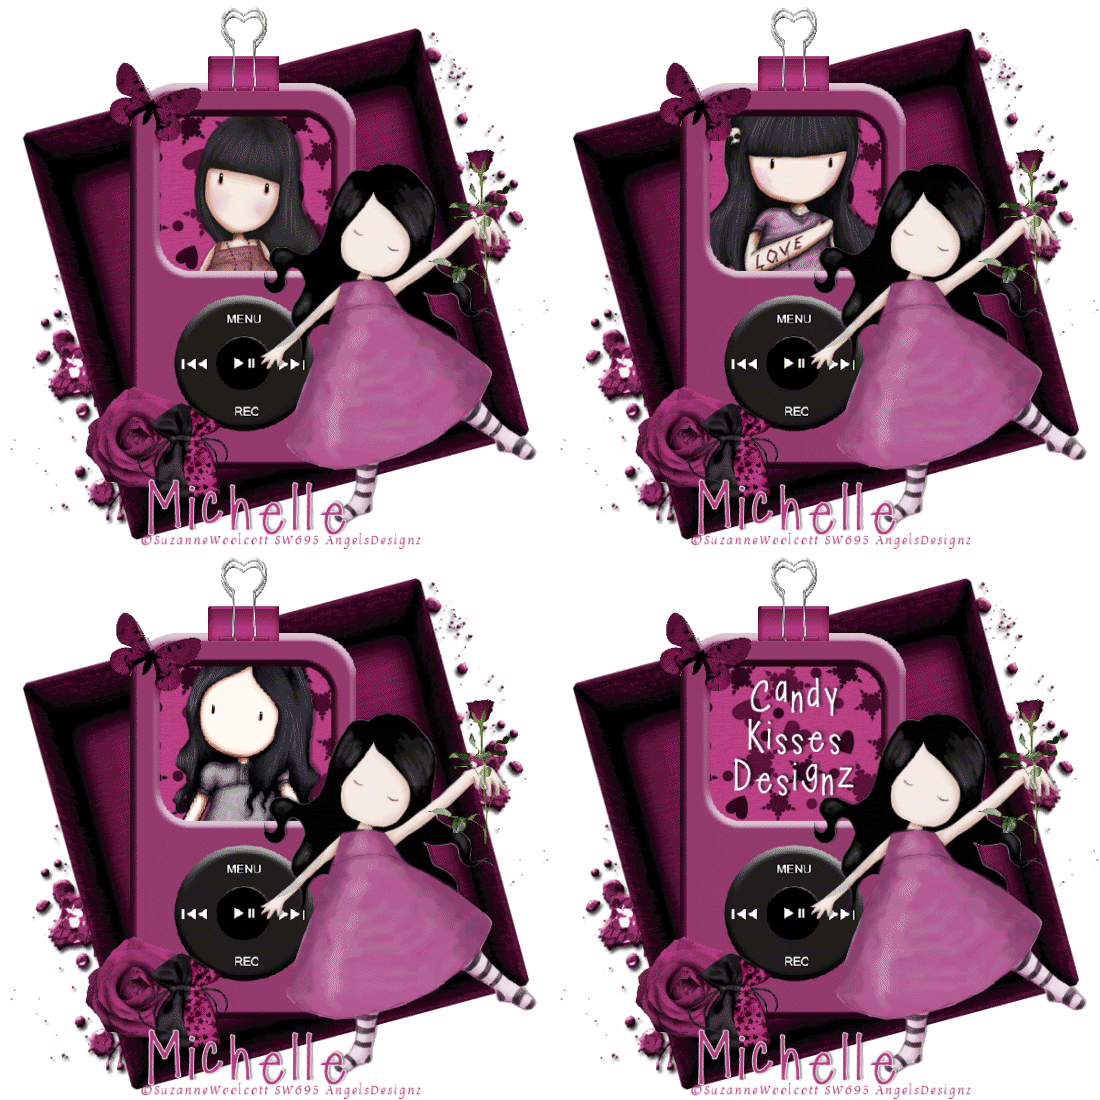
I'm using a beautiful kit called Always made by CandyKisses Designz.
This is a PTU kit. You can purchase it here
I'm using the wonderful work of Suzanne Woolcott.
You must have a license to use her work!
Let's Begin
Open New Image 600x600Flood Fill white
Copy and paste the Ipod2
Resize 80%
Take your magic wand tool
Take your magic wand tool
Click on the inside of the window on the ipod
Selections,Modify,Expand by 5
Selection,Invert
Copy and paste Paper of choice
Copy and paste Paper of choice
Hit delete on your keyboard
Selections,none
Move this layer below the Ipod
Copy and paste your 1st tube of choice
Copy and paste your 1st tube of choice
Place to your liking in the ipod window
Grab your magic wand tool again
Click on the inside of the window on the ipod
Selections,Modify,Expand by 5
Selection,Invert
Highlight the tube layer
Highlight the tube layer
Hit delete on your keyboard
Selections,none
Move this layer below the Ipod but above the paper
Rename tube1
Now hide this layer
Do the same thing again for the next 2 tubes
Do the same thing again for the next 2 tubes
Rename them tube 2,tube 3
Hide these 2 layers as well
Do the same thing above
Do the same thing above
,but this time type out wording
(I'm typing out Candy Kisses Designz)
Find ur 4th tube
Find ur 4th tube
Copy and paste
Resize if needed
Place to your liking or like mine
Add a dropshadow of choice
Copy and paste littlebag2
Copy and paste littlebag2
Resize 30%
Place like mine
Copy and paste flower1
Copy and paste flower1
Resize 40%
Place behind the littlebag2
Copy and paste the butterfly1
Copy and paste the butterfly1
Resize 20%
Image,Mirror
Place like mine
Copy and paste block2
Copy and paste block2
Move below the paper but above the white background
Image,Rotate,Free Rotate 15.00 Left
Copy and paste heartclip
Copy and paste heartclip
Resize 30%
Place at top of block and ipod
Copy and paste glittersplat2
Copy and paste glittersplat2
Move below paper but above white background
Make sure it's sticking out a little on behind the block
Duplicate,Image,Mirror
Copy and paste flower4
Copy and paste flower4
Resize 30%
Place in your tubes hand,so it looks like she is holding it.
Add Your Name and CopyRight Info
Now Resize your tag 550x550Smart size
~Time to Animate~
Make sure tube2,3,and wording is hidden
Unhide tube1
Add Your Name and CopyRight Info
Now Resize your tag 550x550Smart size
~Time to Animate~
Make sure tube2,3,and wording is hidden
Unhide tube1
Copy Merge
Over to Animation shop
Paste as new animation
Back to PSP
Hide tube1
Unhide tube2
Copy Merge
Back to PSP
Hide tube1
Unhide tube2
Copy Merge
Over to Animation shop
Paste After Current Frame
Back to PSP
Hide tube2
Unhide tube3
Copy Merge
Back to PSP
Hide tube2
Unhide tube3
Copy Merge
Over to Animation shop
Paste After Current Frame
Back to PSP
Hide tube3
Unhide wording
Copy Merge
Back to PSP
Hide tube3
Unhide wording
Copy Merge
Over to Animation shop
Paste After Current Frame
Click on first frame
Click on first frame
Animation,Frame Properties Change to 75
Click on frame 2
Click on frame 2
Animation,Frame Properties Change to 75
Click on frame 3
Click on frame 3
Animation,Frame Properties Change to 75
Click on frame 4
Click on frame 4
Animation,Frame Properties Change to 100
Check animation
Check animation
Once happy with it,Save as a gif
~All Done,Thanks for trying my tutorial~
~All Done,Thanks for trying my tutorial~
Labels:
MY TUTORIALS
|
0
comments
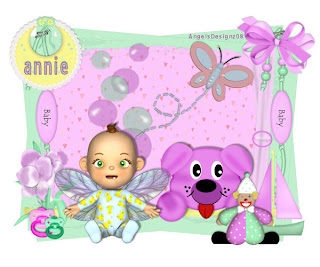
Bubbly Baby
All of my tutorials require a working knowledge of PSP!
This tutorial was written by me on December 5,2008.
This tutorial was written by me on December 5,2008.
It is of my own ideas and creation!
Any other tutorials found to be similar is coincidental.
Supplies Needed
Scrapkit of Choice~
Supplies Needed
Scrapkit of Choice~
I'm using a kit called Precious made by Annie @ Annie's Design.
You can purchase this Oh So Cute kit here
Let's Begin
Open New Image 600x500Flood Fill white
Find the frame
Image,Rotate CounterClockwise 90 degrees
Copy and paste as new layer on your white canvas
Resize 60%
Grab your magic wand tool,click on the inside of the frame
Grab your magic wand tool,click on the inside of the frame
Selections,Modify,Expand by 11
Selections,Invert
Pick a paper of choice
Pick a paper of choice
copy and paste
hit delete on your keyboard
Selections none
Move below frame layer
copy and paste the baby fae-2
copy and paste the baby fae-2
resize 60%
place on left bottom corner
add a dropshadow of choice
Copy and paste ribbon3
Copy and paste ribbon3
Resize 40%
place on bottom of frame
copy and paste the butterfly
copy and paste the butterfly
resize 60%
add a dropshadow
Place to your liking
Copy and paste the dog of choice
Copy and paste the dog of choice
Resize 40%
Place on frame like mine
Add a dropshadow of choice
Copy and paste the clown
Copy and paste the clown
Resize 30%
Place to your liking
Add a light dropshadow of choice
Copy and paste bubble1
Copy and paste bubble1
Place behind the baby fae
add light dropshadow
Copy and paste bubble2
Copy and paste bubble2
Image,Mirror
Place behind baby fae
add a light dropshadow
Copy and paste bead2
Copy and paste bead2
Resize 40%
Place like mine
add a light dropshadow
Duplicate the bead 2,move over to other side of frame
Copy and paste the boat
Duplicate the bead 2,move over to other side of frame
Copy and paste the boat
Add a light dropshadow to it
Copy and paste the bavet5
Copy and paste the bavet5
Resize 30%
Place on top left corner
add a light dropshadow
Copy and paste the flower
Copy and paste the flower
Resize 40%
Add dropshadow of choice
Copy and paste a both soothers
Copy and paste a both soothers
Resize 40%
Add a light dropshadow and place to your liking
Copy and paste bow6
Copy and paste bow6
Resize 30%
Add dropshadow of choice
Place on top right corner of frame
Add Your Name and CopyRight Info!!
~All Done,Thanks for trying my tut~
Add Your Name and CopyRight Info!!
~All Done,Thanks for trying my tut~
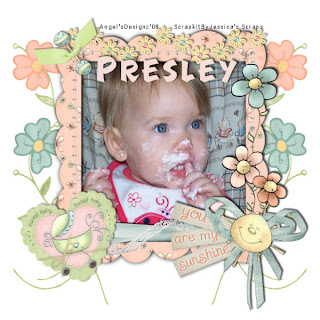
My Sunshine
All of my tutorials require a working knowledge of PSP!
This tutorial was written by me on November 28,2008.
This tutorial was written by me on November 28,2008.
It is of my own ideas and creation!
Any other tutorials found to be similar is coincidental.
Supplies Needed
Scrapkit of Choice~
Supplies Needed
Scrapkit of Choice~
I'm using a Beautiful kit called Sunshine Baby made by Jessica's Scraps.
You can purchase this kit here
I'm using a picture of my daughter
Let's Begin!
Open new image 600x600Flood fill white
Copy and paste frame3
Resize if needed
copy and paste the rattlerainbow
copy and paste the rattlerainbow
resize 60%
add a dropshadow of choice
Copy and paste your picture of choice
Copy and paste your picture of choice
Resize if needed
Click inside the frame with your magic wand tool
Click inside the frame with your magic wand tool
Selections,Modify,Expand by 12
Selections,Invert
Now highlight your picture
Now highlight your picture
hit delete on your keyboard
Move picture below the frame
Add a dropshadow of choice to the frame
Copy and paste tag2
Add a dropshadow of choice to the frame
Copy and paste tag2
Resize 60%
Image,Rotate,Free Rotate 15.00 Left
Place on bottom left corner
Add dropshadow of choice
Copy and paste the flowerribbon
Copy and paste the flowerribbon
Resize 60%
Place at top of frame
add dropshadow of choice
Copy and paste a doodle
Copy and paste a doodle
Resize if needed
Duplicate this image 3x's,
place like mine and move below frame and picture layer
Add Name and Copyright Info
~All Done,Ty for trying my tut~
Add Name and Copyright Info
~All Done,Ty for trying my tut~
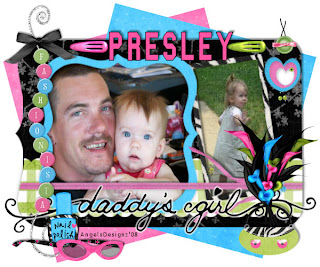
Daddy's Girl
All of my tutorials require a working knowledge of PSP!
This tutorial was written by me on November 14,2008.
This tutorial was written by me on November 14,2008.
It is of my own ideas and creation.
Any other tutorial found similar is coincidental.
Supplies Needed
Scrapkit of choice~I'm using a beautiful kit called Hope made by Jessica @ Jessica'sScraps.
You can purchase this kit
hereTube of Choice~I'm using pictures of my husband and my lil girl.
Plugin-Eye Candy 4000,gradient glow, You can google for this plugin
Let's Begin!
Open new image 600x500,Flood fill white
Find the frame5,copy and paste Resize 95%
Now Pick 2 papers of choice,copy and paste
Resize 65%On your First paper,Image,Rotate,Free Rotate 15.00 Left
On you 2nd paper,Image,Rotate,Free Rotate 15.00 Right
Find your picture or tube,copy and paste
Find your picture or tube,copy and paste
Resize add needed
Use your deform tool to make your image fit in the frame
Add another picture and do the same
Pick your wordart,copy and paste
Add another picture and do the same
Pick your wordart,copy and paste
Resize 65%
Effects,eyecandy 4000,gradient glow with these settings
Basic~ 3.75,0,100 Color~ White,100
Find the beadedstring2,copy and paste
Find the beadedstring2,copy and paste
Resize if needed
Add a light dropshadow
Find the flower1,copy and paste
Find the flower1,copy and paste
Resize 40%
Place on bottom right side of frame
Find the nailpolish,copy and paste
Find the nailpolish,copy and paste
Resize 40% add a dropshadow
Find the sunglasses,copy and paste
Find the sunglasses,copy and paste
Resize 40% Add a dropshadow
Find the tag1,copy and paste
Find the tag1,copy and paste
Resize 30% Place to your liking
Find the button4,copy and paste
Find the button4,copy and paste
Resize 30% Place on top of tag1
Pick a purse of choice,copy and paste
Pick a purse of choice,copy and paste
Resize 30%
Pick out 2 hair clips
Pick out 2 hair clips
Image,Rotate,Rotate Clockwise
Place ontop of frame
Now Add your Name,CopyRight Info if you used something other than your own pictures
~All Done!,Thanks for Trying my tutorial!~
Now Add your Name,CopyRight Info if you used something other than your own pictures
~All Done!,Thanks for Trying my tutorial!~
Subscribe to:
Posts (Atom)
